Tuesday, May 30, 2006

Empennage


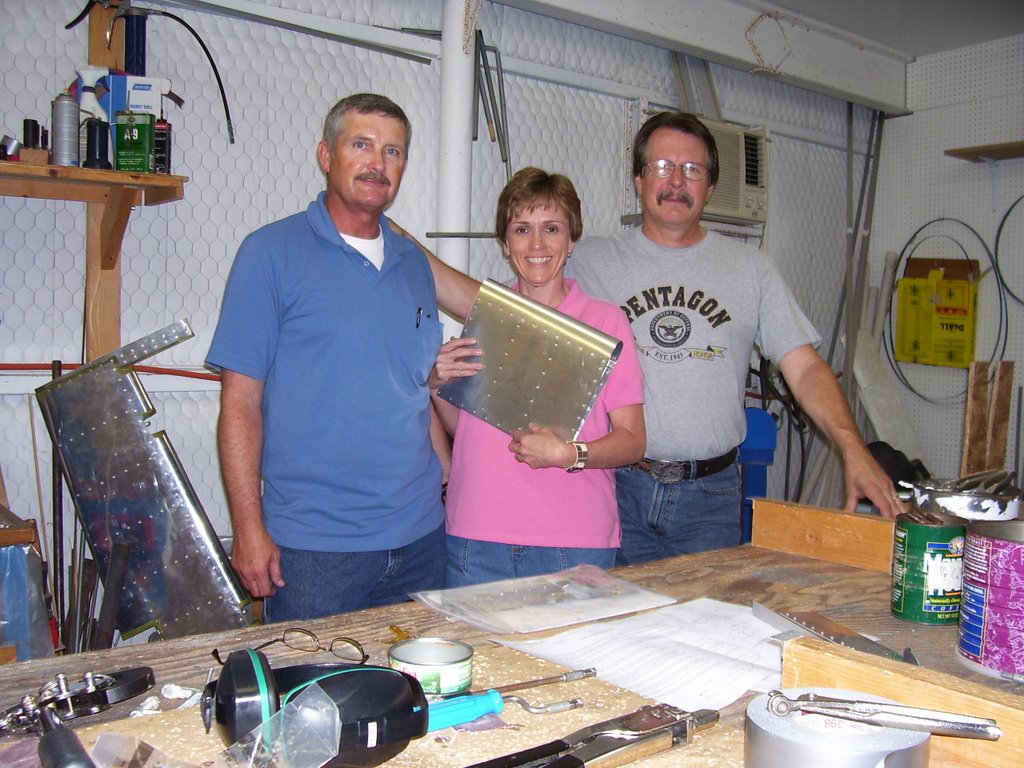
Donna and I went to a sheet metal class over the weekend, May 27th & 28th, to learn the skills that we need to build our RV-7. We attended the class that is put on by George Orndorff at his place in Justin, Texas. The class provided two days of 'hands on' experience and introduced us to the metal working skills needed to build an aluminum aircraft.

The first day we covered the basic sheet metal working techniques - cutting, drilling, countersinking and riveting as well as plans reading, hole cutting and more. The second day we put these new skills to use by building a section of a control surface. The control surface was the RV Training Project from Van's Aircraft. This project covers just about all the skills a person needs during actual RV kit construction.

George was extremely helpful and the small class size allowed the individual attention that promotes a fast learning curve. All our questions were answered and the time spent covering the tools and how to use them really boosted my confidence in my ability to build this airplane. George kept us busy during the course and entertained us as well with the many stories he told.

In his shop we got to see many RV's in various stages of completion. We saw a RV-6 that had just had the engine mounted, as well as two RV-7's, a RV-9A, and a RV-10 that were being worked on. We also got a look at George and Becki's RV-7A and a RV-6A in thier hangar that are absolutely georgous.

All in all it was a very good and productive weekend for Donna and I. We left Ft. Worth to come home on Monday. We stopped by to visit with Red and Gayla Clour on the way. Red is building a RV-8 and we have shared the expense of some tools. He let me take the DRDT-2 dimpler and the pnuematic squeezer with me. I hope to be able to make a lot of progress in this next week before I go back to work in Africa.

Thursday, May 25, 2006

Empennage


I managed to draw first blood on the project today. I was using the scotchbrite wheel on the grinder to trim the excess aluminum from the flange on the HS-702 when something grabbed and next thing I knew there was a small gash on the finger. Imagine that.

As for my progress on the RV-7 today I was able to bend the outboard ends of both HS-710 and HS-714 to the six degree angle called for. I went to Ace Hardware and picked up an angle protractor and measurement device for $13 that worked pretty well for this step. The next step had me scratching my head for a while. I had Donna studying the plans and drawings and she actually figured out the way it was supposed to be done. I marked off the bend line and then drilled the #30 hole and then enlarged it with the Unibit to 1/4". Then it was just a matter of trimming the excess of flange so the proper bend could be made in HS-702. I used a couple of 2X4's to make the bend along the radius of the bend line.

3 Hours

Wednesday, May 24, 2006

Empennage


The drill bits that I ordered over the weekend came in the mail today. I was able to go back and drill the attach holes for the HS-708 to the #19 size. I was also able to use the #12 size to drill the bolt holes that will attach the HS-411 bearing assembly to the spar. That finished up the Rear Spar Assembly so I moved on to the Front Spar Assembly.

I took the two HS-702 front spar channels and put them end to end. Then I cleco'd the HS-710 and HS-714 reinforcement angle to them. Then I drilled the holes inboard of the HS-404 and HS-405 rib attach points. When that was done I took HS-710 and HS-714 off and tapered the ends as per the Taper Detail in the drawing.

2.5 Hours

Tuesday, May 23, 2006

Empennage


Pulled out the hand squeezer and riveted the VA-146 assembly together. I had picked up a spray can of the self etching primer at the NAPA store in Weatherford and primed the bearing after I had cleaned it up. Being the first time I used the squeezer I wasn't too sure of how it was supposed to come out. Section 5 of the manual says the 'shop head' is supposed to be 1.5 times the size of the shank of the rivet. On the first squeeze I couldn't tell that it did too much. I called my friend Red and asked him about it. He's in the middle of building a RV-8 and has been here already. He said I could put some thin washers behind the dies which would give more squeeze to the rivet. I ended up doing that with one washer, and then with another one. I took these pictures and e-mailed them to him. I hope that he'll let me know if I need to put another washer or two in the squeezer.

1.0 hour

Monday, May 22, 2006

Empennage


Cleco'd the elevator hinge brackets to the rear spar assembly and drilled the holes to the #30 size. Assembled the brackets and the VA-146 bearing assembly together and drilled the holes in the brackets. Deburred the parts and prepped for priming and riveting.

1.5 hours

Sunday, May 21, 2006

Empennage


Spent another two and a half hours on the project this afternoon. I didn't work on the project yesterday because I went to the Air Show at Altus Air Force Base and watched the Thunderbirds perform. They're definitely worth going to see, and at Altus the admission was free!

After church today I pulled out the old charcoal grill and fixed hamburgers for Donna and I. Then we went to look at a house during an 'Open House'. We're trying to find a place for my Mom and get her to move up closer to us.

I finally got in the shop about 2:30 and got busy. I used the air drill and final drilled the holes in the pieces I've been working on to a #30 size. Then I used scotchbrite and really cleaned up the pieces. I used the deburring tool and was proud of the finish I came up with. Sure is smooth and nice to the touch. When I got to the next step in the plans (#4) I discovered that I don't have a #19 drill bit. A little oilfield research let me figure out that a #19 is a 0.166 and my drill bits don't come in a size to match. So I reckon I'll order a set of bits off the Internet tonight so I won't run into this problem again.

2.5 Hours

Friday, May 19, 2006

Empennage


Well I finally got around to trying to make a start on the project today. Since I did the inventory the other day I got caught up in a bunch of honeydews and a trip to spend a couple of days with my son Jake and his wife April. When we made it back home I had another project that I had to get out of the way. My youngest son Jim had been to see us on the Mother's Day weekend and his 1990 Isuzu pickup was leaking oil in the worst way. When I asked him why he didn't get that fixed he said he thought he'd leave it with me. So he took the Mercury back to Tulsa with him and I have the Isuzu to work on. I looked it over and couldn't find the leak so I took it down to Mike's Auto Repair and left it with them. Two days and $161 later we have a pickup that doesn't leak oil anymore. Of all things, it was the fuel pumped that was the problem.

Anyway, today I got back in the shop and started looking around at the project and trying to figure out how to start. I pulled out my air tools and spent some time putting those in order. The rivet gun came with a beehive spring and it took me the longest time to figure out how the sets worked with that. I finally put the 'quck change' spring on and figured out real quick that was the way to go with that. Then I got out the air drill and decided to take the chuck off and install the keyless chuck that I bought. Before long I had that thing in about a dozen pieces and figured I had ruined it for sure. But a bunch of persistance paid off and I finally got it put back together. That's when I figured out that the chuck just screwed on. So I got that finished up and even tried out both of them and was proud to see that they worked just fine.

Then I got out the RV-7 plans and put the first two drawings up on the wall behind the workbench. I thought that would be a quick reference while I was working. Then I got the manual and started reading page 6-1 The Empennage. I located the parts that you start with and got to use the scotchbrite wheel to "break" the edges of the spar reinforcement bars. I messed with that until I was satisfied that they fit in the spar channels and everything was properly aligned. Then I spent the time to round the ends of the bars as shown in the drawing. I had been working in the shop for about five hours by then and decided to call it a day.

5 Hours

Saturday, May 13, 2006

Empennage

Opened boxes and inventoried contents, all accounted for.
3 hours